
This chapter describes an extensive list of various Supplements and Add-Ons, including such weirdo material as cat hair. The information on this page provides either more information on ones in the book, or new materials that can be added to your enemaels.
TOC
|
Button Wafers
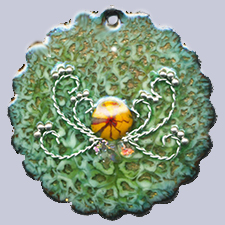
These are larger versions of the Floral Wafesr, both sold at e-namel.com and made by Tim Ellis. They look strange as they are a puddle of glass with a stem in the middle - you fire them with the flat side down about 1 min 10 sec at 1450°F and voilá - you get a flower. Here is what I did with one:
Dichroic Extract Powder by CBS
This product is mentioned in the book. It is a high quality coating that will give your enamels the look of dichroic glass. Here is a video on how to apply Dichroic Extract to glass. Of course this will have to be adjusted for working on enamel, but I don't think the change would be too difficult. For example:The video states that to brush on this powder, it's best for the glass to have a texture to it. She shows what to do for glass, but for enamel, try this adjustment: sugar coat using clear enamel. In fact, my guess is that Thompson luster powders can also be applied this way. But experimentation is needed - just something else to try!
Dichroic Glass Frit Flakes 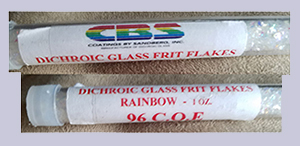
These are small pieces of Dichroic Glass that either come in clear or with a black backing. In general, I suggest the clear because if using the black backed pieces and they flip over, you will not see the color. Note that these are not the normal frit - these flakes are smaller. Embed them as with other small/flat Add-Ons as described in the book.
As you can see, these are 96COE and manufactured by CBS. But they are available at many glass fusing suppliers.
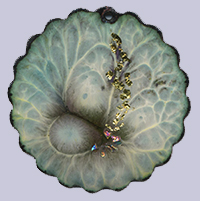
Here is a piece I made using these flaks.
 Glitter Enamel by Cheryl Anne Day-Swallow
Here's a new product to consider when you like a little bling in your enamels. These glitter enamels come in 3 colors (silver, gold and bronze) and 3 sizes (small, medium and large) and are compatable with all Thompson Enamels unleaded enamels. Developed for torch firing, they can be used in a kiln, of course, but cannot be used with a sifter. A sealer coat is also required and this mixture can be sifted. Check out Glitter Enamel and watch a video on using it. See the background of the peacock to the right for a sample.
Another type of "glitter" can be created - see Jazz Enamel below.
Goldstone
The manmade glass called Goldstone can be used in crushed form, mixed with enamel, and fused as with other enamels to produce a look like gold glitter. I have only tried the regular Goldstone, not the blue, so that is left for future study. To use, you'd have to crush it yourself or get pulverized goldstone from someone who sells - the link provided is for 3 sizes, buy the FINE (.425 mm). To mix with enamel mix enamel:goldstone as 1:1 or 1:2 or try other proportions. Keith Lewis was maybe the first to experiment with goldstone in the US.
Note that the Japanese produce a type of enamel called Tea Goldstone or just Goldstone (Chakin-seki) which fires very similarly. This is still available in Japan, but only comes in brown. I have some, but have not been totally successful with it and when I am I will update this post.
In any case, the "glitter" is produced by small pieces of crystals of metallic copper. I tried to use filed copper bits and that didn't work for me because the copper oxidized. For some reason in the pulverized goldstone or Chakin-seki, the oxidation is not a problem. I have used the pulverized goldstone successfully mixed with flux, transparents and sometimes with opaques for both leaded and unleaded enamels. I have also used it in Cloisonne which requires grinding at the end and refiring to gloss and which works well. Here is a piece to show what I've done. I have noticed a few things:
- It doesn't work well directly on copper or silver (seems to look greenish on both)
- You can only fire it about 2-3 times before it goes away (sinks into surrounding enamel?), but you can reapply and fire and it's fine
- For opaque colors, it might be best to mix with flux and then use as a layer or two over the color. This also works with transparents if you decide after using a color that you want some glitter on it.
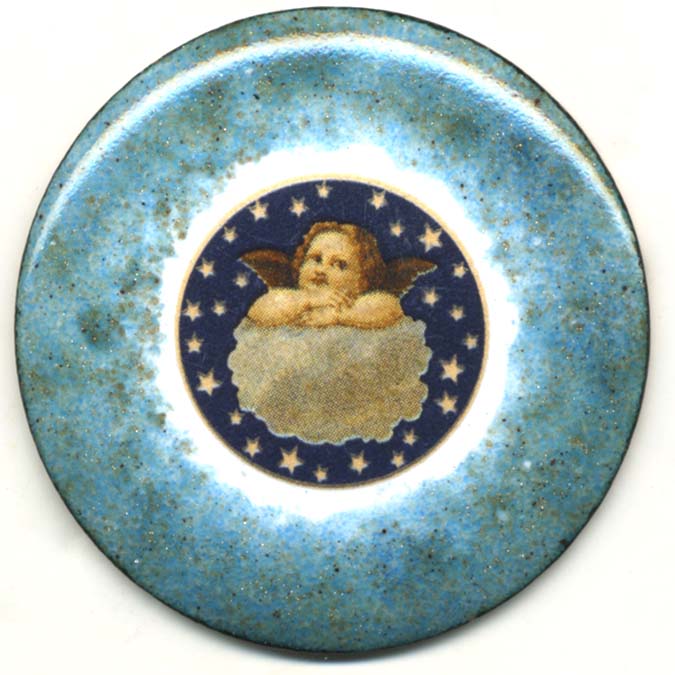
The golden flecks you see in the border of the decal are glittery when moved from side to side.
Fine Line Pens
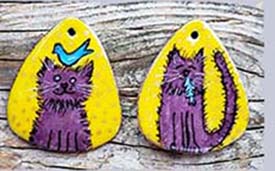 Various types of pens can be used to draw fine lines with liquids such as Underglaze or Overglaze or the "ink" that Lydia Morrison describes in the book on page 34, made out of BWC cake watercolor enamels. Typically the crow quill pen is used. But Lydia has found two other pens she prefers. One is the Ruling pen (originally used by draftsmen) which she feels holds more liquid than the crow quill. See the cat earrings that she loaded her black "ink" only once to do all that drawing. Watch a video on use of the Ruling Pen, which can be adjusted for line width. One place to get it is here.
![]()
Another pen, that also would hold more "ink" for enameling, is the Kemper Gold Pen:

Sand enameling by John H. Killmaster III
The book discusses John's use of sand, but he is taking it to a new level... sculpting with sand and enamel and calling it Sandenameling!
The book: Killmaster - Art And Soul is all about John's work. Written by art critic Christopher R. Schnoorm the photos are sure to wow you.
 Stone Setting in an enamel - with a bezel
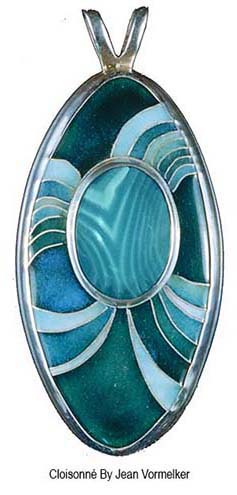
The Supplements and Add-ons chapter in the book discusses a few ways to embed stones in an enamel. For example, James Malenda wrote an LLT on his method he calls Champavé - how to embed a heat tolerant translucent stone (like a CZ) in enamel with light behind it. But Jean Vormelker has a method not described in the book for any type of bezeled stone and it is presented here.
Jean is an experienced enamelist who has a series of pieces where the enamel mimics a stone's beauty. She does this in both Cloisonné pieces (see photo to right) and enamels without wires (see finished piece below). But in either case she follows these basic steps (differences are noted where appropriate):
- Form a fine silver bezel to fit the stone and solder it closed with either Hard, IT or Eutectic solder. The bezel must be taller than any Cloisonné wire being used in the piece so the bezel can be pushed over the stone later. Carefully check the height and girth fit before going further. Note that the bezel can also be fused, as described in the book.
- Hard solder will withstand the 1335°F firing temperature used when copper is the base metal. If using a silver base, you can fire up to 1450°F.
- IT or Eutectic solder should be used when the base is fine silver and firing will be at 1450°F or above
- A Cloisonné wire is then tightly fitted around the formed bezel and soldered separately to control any springiness (note this in the Banded Agate photo to above). But it is the enamelist's choice to solder or not solder the Cloisonné wire - if the Cloisonné wire is behaving properly and fits snuggly around the bezel and stays there, no soldering is necessary. However, if the wire isn’t properly annealed and not soldered, it can jump out of place during firing and attach incorrectly in the base enamel. In which case nasty words may then spill forth. (Note: All Cloisonné wires in the piece should be the same height.)
- The purpose of this wire is to give a visual reference for the height the enamel needs to reach and also frames the bezel and guides the stoning around the bezel at the end. (More about this later) This wire is used whether the piece will be Cloisonné or not. She rarely omits the cloisonné band around the bezel, and then does so only for specific design reasons.
 The bezel with its Cloisonné wire (looking like an inside-out step bezel) are embedded into the enamel as one would embed any other Cloisonné wire. This can be done with the first layer of enamel when the bezel and base are both fine silver, firing approximately at 1500°F. If the base is copper, a base coat of enamel is required before adding the bezel and its band. Firing the wires in the enamel at 1335°F for about 2 minutes and no higher for the rest of the piece (see photo to the right).
- Cloisonné wires are added to follow the pattern of the stone (or whatever your design is) and fired in place (see photo of Banded Agate pendant above. See what a great job Jean does in matching the enamel to the stone!).
- Enamel, inside and outside the bezel, is completed as per the technique you are using, firing as needed. Note: Adding enamel to the same height in the stone area as around it helps to secure the bezel.
- Enamel is finished as you would normally finish the enamel with cleaning up the edges and grinding if needed. To do this Jean normally finishes by hand, using various grits of diamond hones with a hard, flat backing, dipping in water to keep diamonds cool and to rinse away debris, although in the past she has used alundum stone. Be very careful doing this as you want a good even surface on the enamel and do not want to damage the bezel. Tape on the bezel will help protect the bezel if in doubt. The Cloisonné wire around the bezel is your guide for evenness so you can bring the hone close to the bezel to make sure all the wires and enamel are even and any stray enamel is removed from the Cloisonné wire. 3M finishing papers by hand or Bristle Disks in your Flexshaft will smooth any scrapes in the metal before flash firing for a shiny surface.
- If there is no cloisonné wire around the bezel as in the Pathways to the Sea, no stoning was required as the enamel was allowed to undulate to the bezel and around the piece to fit the sea theme. Also, if the enamel is purposefully underfilled, only a light stoning to even the wires is required.
- Set the stone in the bezel using normal bezel setting techniques. In addition, Jean makes a setting for the enamel and sets that, too.
Jean's work can be viewed on her website.

 Stone Setting in enamel - with a gold ball
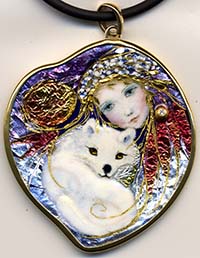
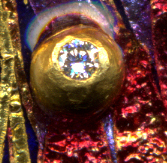
Mona Szabados sets small diamonds in a unique way - she embeds a 24K gold ball in the enamel and then drills out a space for the diamond, leaving a thin wall that she uses as a bezel to hold the stone in. Diamonds can take the heat of the kiln, but cannot be ebedded directly into the enamel as the enamel will craze. Mona says she uses the highest quality diamonds because lesser ones will lose their sparkle after a few firings. See the detail of the woman's earring below.

Stone Setting in enamel - with a Bought Bezel Cup
Two sites currently selling pre-made bezel cups are Rio Grande and Twisted Turtle
Studio. Rio also sells stone cabs that fit their bezels and Twisted Turtle Studio sells glass cabs that shimmer like opals that fit theirs. All are easy to use in enamels. Purchase the fine silver bezel cups so they are easy to burnish around the chosen cab when setting the stone.
What I've done is to create the enamel until the last two firings. On the second to last, I use watered down Elmer's glue to "glue" the bezel cup in place and let dry completely. Then I fire, temperature depends on the rest of your piece, but don't fire too high. When cool, check if the cup is securely in place. If not, or to ensure security, wet pack a bit of the background enamel around the cup, ensuring you do not get the enamel too high such that it will interfer with stone setting, and fire again. Completely finish the piece with polishing and then set the cab.
Jazz Enamel
This is a supplement developed by Sydney Sherr, an award winning designer, goldsmith, sculptor, illustrator, and educator (although all her 2020 classes are canceled because of the Coronavirus). Sydney is happy to share how you can make this yourself. Here are some pieces that she used this Jazz Enamel in:
| Jazz Enamel can be made in small pieces and fill a space much as glitter does. See the silver space aroudn the top circular piece. | Jazz Enamel can be made into strips as in this piece by Sydney Scherr with a detail of the Jazz Enamel. | |
 |
|

![]() Instuctions Coming Soon!
Instuctions Coming Soon!
Ink Pad for Enameling
There are quite a few metallic inks that work with enameling, like liquid gold or mica pens (Skura Gelly Roll Metallics - gold, copper and silver), but what about stamp pads so one can use rubber stamps? Lydia Morrison found this ink pad:
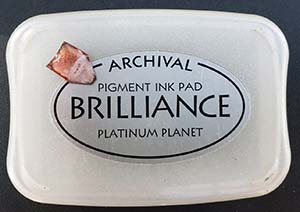
Note the sample chip in the upper left corner of the label that Lydia did. This is made by Tsukinek who also makes other metallic ink pads. But Lydia has not yet found another that fires and holds its color. If you try others, please contact me with your results.
The book does talk about normal black ink pads that can be used for the Sift & Tap (pg 84) to get a stamped image onto your enamel (see page 93).
O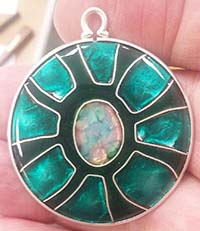 pal Jewel Effect
This is a Thompson Enamel product, #2001, only comes in lump form and is medium fusing for copper, silver or gold enameling. Here are two suppliers - e-namels.com and Enamel Warehouse. These lumps can be fired over colors to produce a jewel like effect, especially like opals.
If fired to full fusing, a few together will dome up into a mound like a cabochon, and then when fired for a shorter time at a lower temperature, will be sort of milky. Irmgard Carpenter (wife of Woody Carpenter who used to own Thompson Enamel) developed a process for these lumps that looks like an opal. See the photo at the right which was a pendant done by Tom Ellis, Technical Editor of my book. When purchased, you might get larger lumps than needed (see below on how to make them smaller) - if possible, order size 6/20 mesh of #2001 Opal jewel Effect lumps.
Here are the steps to get this interesting effect.
- Prepare a a base of enamel on your fine silver or copper piece and fire. Note: if using copper, use copper Cloisonne wire and if using silver, use silver wire.
- Bend the Cloisonne wire into the shape you want, like a circle or oval, and fire this onto your base, as you would for any Cloisonne wires (see the Cloisonne project in the book for details).
- Cut small pieces of gold and silver foil and place inside the wire fused in the previous step and fire.
To look like an opal, place these close together to form a mosaic - see the LTT on page 43 "Cutting Foil To Use As A Mosaic Pattern". Variations at this point are to cut larger pieces, don't place pieces totally next to each other or use only 1 type of foil. - Wet pack thin bits of transparent blue, green and red over the foil, keeping in mind that the warm colors have a reaction to silver. Do not fire yet (but I have and it works fine to fire now).
- Load inside the wire area with #2001 6/20 lumps, on top of the unfired enamel. Now fuse fully until the lumps form a dome over the colored foil. Fire at 1450°-1470°‚ for maybe 2 minutes. Cool. Variations are to use another type of clear lumps or to underfire the lumps so they remain bumpy. (I prefer to fire the full 2 minutes becuase if you don't, it's possible that the lumps form a cab shape but are not totally fused and when you complete the process you will see a line where they are not fully fused.)
- Now fire the piece again for a shorter time at less temperature than the full fuse (maybe only 1 minute). This resuls in a milky coating over the foiled colors. Note: this should be the last firing of your piece, no matter what else you are doing as you want to preserve the milky look you get which could go away with another firing. I had mixed results with this until Tom suggested the following which so far has worked everytime... Fire the last firing at 1250°F for 4-5 minutes. If you have to fire again at a higher temperature, the milky look will go away, but you can refire lower again and get the milky look back.
You will have to determine when this should be done on your piece, taking into consideration the other part of the design.
In doing some research, I found a book written in 1899 by an enamelist: On The Theory and Practice of Art-Enamelling Upon Metals by Henry Cunynghame. In this book (page 93 of a reprint by Forgotten Books) it talks about make an opal looking intaglio using dissolved gold, flux and 10% arsenic! Interesting, but I don't want to work with dissolving the gold (in acid) or the arsenic. If you do, please contact me to show what you've done.
How to Make Lumps Smaller
Sometime you buy enamel lumps and they are too big for how you want to use them. One way to make them smaller is to put them in a thick plastic bag and hit them with a hammer. But that frequently breaks the bag or you get dust instead of lumps. Here is a way that Lydia Morrison crushes them with a mortar and pestel. The main thing is to not hit too hard and to cover the mortar - Lydia uses cardboard from a cereal box - check out her video: sorry it is no longer working. I'll try to get it up another time.
Sakura Gelly Roll White Pen
The book talks about the Sakura Gelly Roll Metallic pens that work with enamel, but not the white. These white pens come in 3 sizes and work great on enamel, matte or shinny. Check this out for a sample. These are oil based pens.
Note: I have just bought new Sakura Gelly Roll Metallic gold and silver pens and they no longer work the same as older versions. I'm trying to get in touch with Sakura but so far they are not responding. The gold is the worst - it does not fire gold. If you find a source for a good gold pen please let me know.
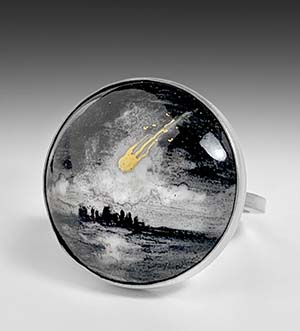 Liquid Gold and Gold firing pens
In my book, page 48, I have information about Liquid Metals. Gold is the typical one. It shows a sampler of it's use and how wonderful it looks completely overfired. But to get it solid and even is not an easy thing.
Teresa Kiplinger does a great job of getting Liquid Gold solid. She says: "The liquid gold is applied very thinly and evenly; one smooth layer; don't go back over it when it's wet. I read on Ganoksin that this is the key to using liquid metals and I've found it to be true. I also torch fire, so I can observe progress and remove the heat as soon as it turns metallic. (This can be seen through safety glasses.) I think this might make it easier to avoid over-firing. The surface must also be absolutely completely spotless clean for liquid metallics. I love the look, but it's never precise... Sometimes there are dark spots within the gold, but I enjoy the imperfections, so it's not a bother to me". To get the surface absolutely spotless, try wiping it with alcohol.
Teresa's piece at the right is called End of Days and uses her style of black washes painted on a white surface - Stunning!
Liquid gold in pens or ink or just bottled might have to be dried properly before firing. To do this, try putting in the kiln for 5 seconds and then removing, then another 5 seconds and then a 3rd 5 seconds. By this time the organics should be burnt out and the ink dried.
For Liquid Gold and Gold Pens (not mica ink) try firing at 1200°-1250° for up to 2 minutes.
Pens and Gold
Page 53 talks about Sakura Gelly Roll Metallics which are mica pens. The older models do work great but the newest version of the gold (as of 2025) does not fire gold. The silver is okay but not as good as the older versions. I am in touch with Sakura and htey are sending me samples to test. Do not use these new versions for enameling. So the hunt is on for a pen for gold and silver that fire onto enamel. If you find one, please email me.
There are some gold pens already available, but might not be mica, and not sure if they all fire on enamel - let me know if you try one.
- Liquid Bright Gold Pen (CERAMIC MARKER) - Coral Shaffer used to sell this - very expensive and if you don't use it all the time, the tip dries out. So if you get this pen, buy extra tips for replacements. Fires onto enamel fine.
- Ferro Gold Rush - many sites have this as discontinued. Less expensive than the Ceramic Marker but still not as inexpensive as mica pens. Fires onto enamel just fine.
- Favorites of Kathleen Wilcox who says: Try firing these mica inks at 1450°F for 45 sec. or 1400°F for 1 min 30 sec. Also, Kathleen recommends to mix the jars really well, digging down to the bottom, because just shaking is not sufficient.
- Dr. PH.Martin's Iridescent inks - Kathleen's favorites are R11 Copper Plate Gold and 16R Copper but others might also work fine (testing is needed).
- Kuretake Gold Mica Ink - also comes in silver. Check places like JetPens.com and more. Barbara Minor also loves this and fires at 1450°F.
- Some mica paints, if adding enough water, should also work for crow quill pens.
- Sakura Gelly Roll Shadow pens - Gold and Silver - Tom Ellis successfully fired the red Gold Shadow which fires gold. Sakura was good to work with and sent me a set. I tested them and ALL Gelly Roll Gold Shadow colors fired gold. They also sent me a set of Silver Shadow pens and although these all fired a grey color, none of them fired silver. Here's my sample

 Found by Barbara Minor - Barbara originally posted this on Facebook: Fluid Acrylics by GOLDEN, Iridescent Gold Deep (fine).
Barbara applied the acrylic paint with a rubber brush to get the pattern and fired at 1430°-1450° F.
I did a test and it fired a really gorgeous gold. Rememer that this is a mica paint so only those particles touching the enamel surface will stick and thus after firing and cooling you will need to wipe the excess off. I did one test where I refired the piece 3 times, never wiping off the excess. When finally done, I wiped off the excess and it was still gorgeous!!!! So you can refire but don't touch the paint before firing again.
Barbara hasn't tried the acrylic paint with a pen because it's quite thick. Try using the Ruling Pen - watch the video at this link for how to use. I have tried it now and it works great. You can draw freehand with this pen, but I didn't find I could draw a very thin line.
- Kuretake Brush Pen No. 60-Gold - Barbara Minor is now testing this. Results will be posted when I get them.
Pens I've tried that do not work
- Gionew Gold Gel Pens
- Pilot Gold Metallic Permanet Paint Marker - this one is nice because it has an extra-fine tip of .05mm. I tried firing this at 1300°F and 1500°F and neither fired gold. But without firing it was very nice!
- Potter's Pen Gold - this fires at cone 6-9 so that's about 2300°F and above.
- Sakura Gelly Roll Silver Shadow pens - none fire silver
- Sakura Gelly Roll Metallic Pens - the new ones no only fire gold or silver but these can be used for Sift and Tap method.
Make Metal Balls
The book, on page 50, has an LTT about making metal balls. I have done it the way described for decades. But Merry-Lee Rae has a video of Tips and Tricks in which she shows a different set up that I think is an improvement over just using a hard charcoal block in a metal pan. See this photo of her set up below, but see the free video for more information.On retrieving the balls - Most end up in the groove on the white block or still on the charcoal. She pours them into a soup bowl. Then a mighty blow and the charcoal dust flies out and all she has left are beautiful little granules. BTW - she has quite a few other terrific tips so this is worth watching for more than metal balls!
The book talks about making coils to get balls of a consistent size. But Merry-Lee uses this gadget designed by Kent Raible.
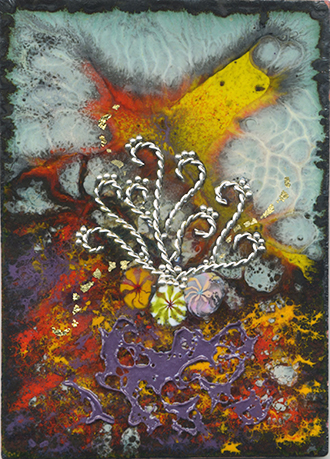
Enamel Leaf
On page 40 of the book, Liana Pattihis has an LTT on her invention of Enamel Leaf. One could also call this enamel lace. Liana tells how to make this lacy looking fused enamel that can then be fused onto another piece, usually it as a supplement. I have been experimenting with it. Liana always uses it on either her wirework or chain pieces, but I fused it to a flat surface. My test firiing resulted in a fabulous granular texture that so far I have not been able to duplicate! But I still like my results. Here are some photos.
Test piece - Enamel Leaf
|
Enamel Leaf |
Test firing |
Ghost Images and water based vs oil based pens
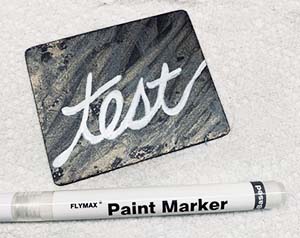
Enamelist Kay Yee uses a water based pen to efffect a "ghost image" of white on enameled Blackboard steel. She can then draw on top of that with an oil or water based pen to get a design that is quite unusual. Kay can be found on FaceBook and Instagram: yee.kay
Here are two ways Kay makes a ghost image...
 |
 |
1. The background is a graphite & a mica wash and fired at 1400°F. Note: only the mica that touches the blackboard will stick so you'll need to rub off any mica that is not adhered. Don't overfire. Some graphite might also rub off and that's ok. 2. Using a water base paint marker (FlyMax Paint Marker), the word 'test' was written. It was dried and underfired at 1400°F. The underfiring allows some of the white to adhere to the black background, but not all of it... |
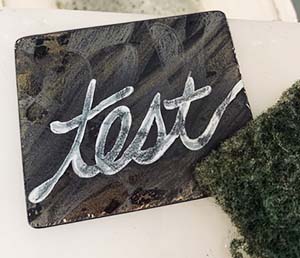
3. After firing the sample was washed with a 3M scrub pad & Dawn soapy water to remove what white pigment didn't fuse. The white "ghost" of the pigment can be somewhat uneven since this is fired on a layer of graphite and mica underneath. But that's fine for a ghost! |
 |
 |
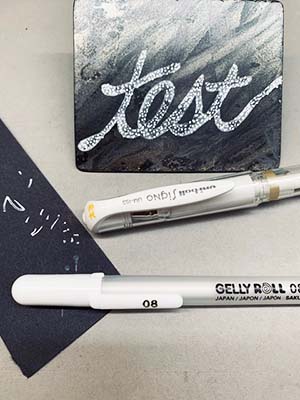
| 4. Details were added on this layer with an oil based gel pen (Sakura Gelly Roll white), because the nib size was smaller than the water based marker I have. One could also use water base pens. What I am doing is adding another layer of detail with pigment.This is then fired at 1425 °F
to completion. |
Final test image after firing. |
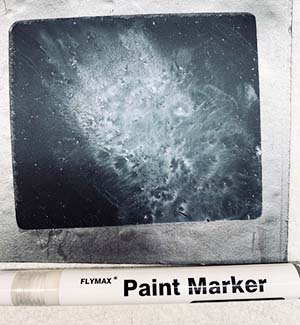
Here is the second way that Kay does "ghosting". In this case she is making a wash of the white...
 |
 |
| 1. This is a test of the night sky using the ghost technique. But I did this one somewhat differently - I laid down a layer of water and then used the water based gel pen to add the white and mixed it with the water to get the blend, using brushes and cotton swabs. Then it was dried and underfired at 1400F. | 2. After the first firing, as before, I wash off any pigment that doesnt stick. Then I fired at 1425°F to completion. |
 |
|
| Final image after firing. | |
More To Do:
- Kay has not tried other water based paints to try this ghost effect, so it is left to the reader to try either enamel paints or other fireable materials like mineral based inks. On page 34 of my book, there is a LTT for making Thompson Enamel water color cake colors into inks that can be used with a pen - I'd expect these would work.
- This should also work on regular gloss fired enamel, but it is left to the reader to experiment with the ghost technique on glossy enamel.
Please note: if you try either of these, please contact me to let me know how your test worked - either yes or no - and I can post your results.
Millefiori
When buying murrini, the generic name for millefiori, one has to consider the COE of the glass and if it's compatible with the COE of enamel. Most glass makers denote the COE in a linear measure as in COE 90 or COPE 96, but enamelists denote COE in a cubic measure which is 3 times the linear measure. Tom Ellis says that Thompson Enamels are in the 260-360 range. If the two are not compatible, cracking can occur or the piece will pop off. That all being said, the COE 90 and COE 96 glass is within range of enamel, but one has to be careful about the potential problems. If the two are not the same COE, then there are less problems if the underlying enamel is thin. Also keep in mind that lower expansion materials should be on top on higher expansion materials. Thus mix COEs with some knowledge of your materials and keep the underlying enamel thin.
 multiple sizes
For many years, millefiori came in one basic size (3-4mm). How SES has multiples sizes (1-2mm and 2-3mm) plus both opaque and transparent of each size. I find the opaque ones more to my liking, but if you use the transparent ones effectively, please send me a photo. Here is my sampler of using 3 sizes in graduated lines...
All millefiori are made of hard glass and come as slices from a "cane" with squared off edges - it is always best to slump (pre-dome) them first before firing into your piece so that the tops are rounded. This takes about 8-10 minutes at 1450°F, but check each minute as you only want to round the tops. Always include them in a firing before softer supplements like flower wafers, metal balls and almost anyting else! Pre-doming is discussed in the book on page 54. To do this you will need a surface to fire them on. The best I've found is an alumina tray with ceramic plate combo.
Non Traditional Millefiori
There are glass workers today making canes for either themselves or to sell to others. Check out the COE of the glass used and check if you are buying a section of cane (you have to slice yourself) or per-cut slices. One artist that has unusual murrini is selling canes is on here.
 Reflector Beads
These are small round balls (no holes), many times used with paint on roads to reflect light so one can see lanes better. They are mentioned in the book on page 47. Reflector beads work just fine fused into enamel and can provide texture and some shimmer. They do come in various sizes and can be inexpensive. I have used them to give texture to a French Poodle (the shimmer is hard to see in a photo).
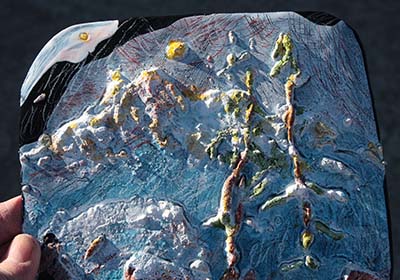
Faux Horsehair Enameling
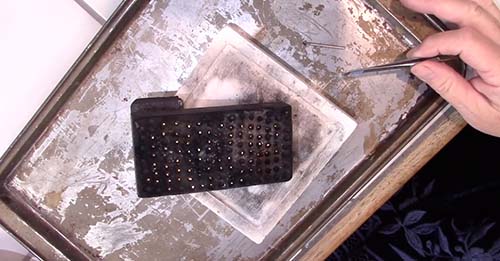
On page 36-37 in my book, Averill Shepps tells how to incorporate cat hair into your enamels so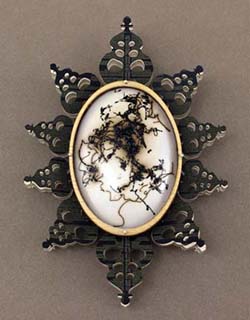 I always wanted to try other types of hair as I don’t have a cat! Alas I never got around to it until Hosanna Rubio gave a talk to The Enamelist Society about her work and mentioned that she was using her own hair to do a technique similar to Horsehair Pottery. Well, I was on it - I went into my studio and tried to use my hair to do like Averill does with cat hair and that didn’t work at all. While scratching my head, I thought - why not just touch the hair to the hot enamel as it came out of the kiln and voilà, I had it! But of course one has to learn to control that the hair does not touch an area you don’t want.
Hosanna started doing this because of her history, which she so elegantly writes up to share with us. I tried it and found that although I cannot flick the marks off with my nails, I can remove them by refiring or using a 3M radial disk and anything else that would be afrasive.
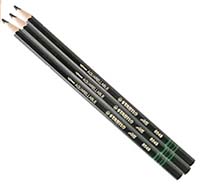 Stabilo Pencils
These all water soluble marking pencils, in white, green, red or black, are helpful for marking your enamels to help you align elements on your piece. Easily erasable with water, they work on etched or glossy surfaces and will burn out in the kiln. Always test before using.
I used this on an etched surface and made a very heavy mark - it never burned out, but was light, after multiple firings at 1450°F. I also tried lighter marks and they all burned out. I tried on a glossy surface and it did write on that so this is a good product to have, just write lightly!
Technically these are not a supplement, but a tool, but where else could I put them - I felt they would get lost in The Studio chapter.
Glycerin
Some enamelists are using glycerin as a medium base for painting or as an enamel glue. Lydia Morrison was talking about glycerin to her husband, Lowen, who is considered the authority on fatty acids and glycerol research at Procter and Gamble, and he highly recommended to not use it. He says that although it is a relatively safe substance, glycerin decomposes before it evaporates. When glycerol is burned it decomposes to acrolein, which is what evaporates, and which is very toxic. Although Lowen does think that it's use in small amounts would be ok with very good ventilation.
If googling this, use it's proper name: Glycerol
Safe limits as per NIOSH REL: under TWA 0.1 ppm (0.25 mg/m3) ST 0.3 ppm (0.8 mg/m3) for 8 hours
References
- https://pubchem.ncbi.nlm.nih.gov/compound/Glycerol#section=Decomposition
- https://pubchem.ncbi.nlm.nih.gov/compound/acrolein
- https://www.cdc.gov/niosh/npg/npgd0011.html
Jet Age Studio
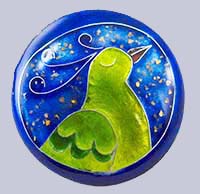
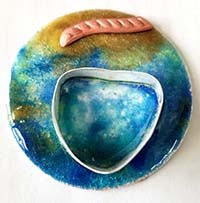
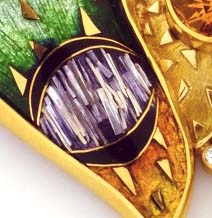
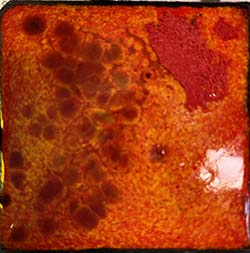
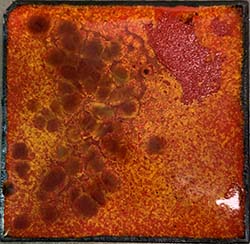
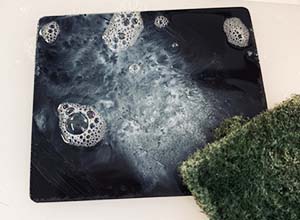
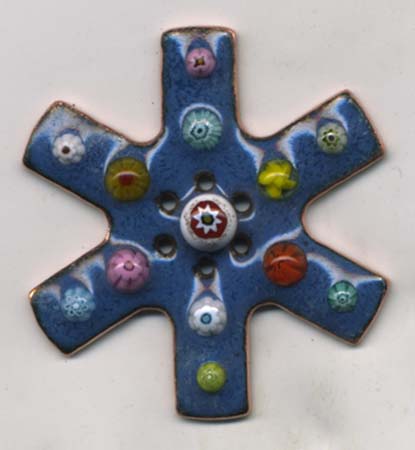
Jet Age Studio makes a variety of flakes and powders that provide shimmering color to your enamels. They reflect like dichroic glass but are different. They sell a sample pack of each color/type for about $2.00 plus shipping. This is a good way to test what you'll eventually want to use most of. Note: I find their naming of products confusing - be aware of this but try whichever color you like with a sample. Like Lusters, only the actual product that touches the enamel will fire on. That is, if you have a double layer, the 2nd layer will wipe off after the piece cools.
A good one to start with is their flake product Lumiere Lusters, which I have used and love. I apply them with just brushing my enamel surface with Klyr-Fire and using the brush to bring the LL from the jar to the area I want to apply them. If the flakes are too big, I break them up with sharp tweezers and move them around with the brush or tweezers. I fire at 1450°F for about 1 min 15 sec, which is also true for the others noted below. Note: I have only tried these on unleaded enamel but can't see why lead bearing couldn't be used.
Red flakes in the "moon" of this button |
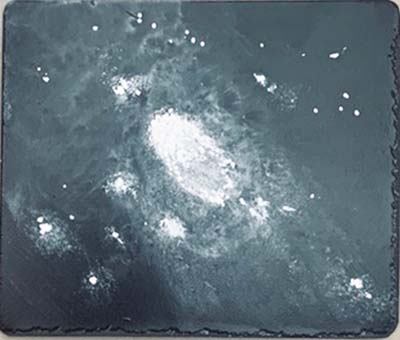
Blue flakes scratter in center of this |


in addition to Lumiere Lusters they have other types of flakes/powders that I am just starting to experiment with. I have found that the Opal Transucent Flake, Silk Series Chameleon Chrome and Jelly Chameleon Multichrome Aurora Powder colors that I tried all work fine with enamel. I have tried firing them twice and they seem to retain their brilliance. I have only tried one of each color but my guess is that they all work.
When I get a good sample photo over black/clear/white, I'll post it here. Still experimenting - more to come.
Mica Paints
The book on page 53 talks about mica paints. Lydia Morrison has found a new set that she likes a lots - Holbein Mica Paints. If you like glimmer in your enamels, also look at using goldstone and products from Jet Age Studio - all add bling to your work. See Liquid Gold and Gold Pens for more ways to get glimmer in your work.